Apr 25, 2011

Weird dreams and slow progress

First and foremost, in case anybody who reads my blog hasn't already been bludgeoned over the head with it, my costume fan page: http://www.facebook.com/pages/Kora/196652593704457   I know I'm nowhere near good or awesome enough to have a huge following; I admit I made it more of in the hopes of one day being at least good enough to serve as inspiration to others. (Also, I have a Question up there that I would like opinions on. *chuckle*)

I realize I didn't do a weekly thing on Sunday like I usually do. It was mostly because I haven't really done much lately that I considered it worth making a post about, but then I found myself thinking that if I don't at least TRY to keep myself on a schedule that I'll eventually fall behind. So, a more meandering post than usual. My random commentary first, followed by the short list of stuff that's actually been done this week.

I had one of those dreams this morning that was both awesome and frustrating. Because I know it will NEVER be real, and I so hated having to wake up from it. There was some sort of Star Wars quasi-convention going on. Only it wasn't just a convention, they had all these massive sets from the movies there (which were probably more massive and realistic in my dream than they were in real life lol), and all the actors were walking around in their costumes only they were the ages they were when the movies were out. Apparently they were using the convention to re-shoot some of the scenes from the classic trilogy only they were using con goers as extras. I remember watching, fascinated, as some people tried out swinging across the chasm in the Death Star like Luke and Leia. For some reason Ewan McGregor was hanging out on that set reading a newspaper. . . .I don't get that part either. I stepped out of that set into the hall of the Tantive IV with Darth Vader and Stormtroopers marching down it, side stepped out of their way into the hanger on Hoth that all the rebel ships were in. I bumped into Harrison Ford in his Hoth gear while I was spazzing out about the fact that they had animatronic taun tauns that they were going to use for the battle scene. (I don't know why my brain decided to add a taun taun cavalry charge to the Hoth battle, but it did.) Somehow I lucked out in the lottery to see which extra you would be and had to go get geared up in Hoth rebel trooper gear as I was going to be one of the ones who got to ride the taun tauns. (I remember the guy telling me I was Hoth Trooper #321, Taun Taun Patrol and going all nerdy fangasm about that.) The rest of the dream was me back over in the Hoth staging area with about 15 others who had the same job as me while we rode around on the animatronic taun tauns, lined up to have our pictures taken with our "mounts," and woke up shortly after I was supposed to be heading to a hotel room to sleep for the night and come back in the morning to actually do the scene.

My brain is a strange, strange place sometimes.

As far as actual costume work, well, it's a short list. Past couple of weeks have mostly been spent with Pere and I trying to deal with real life stuff. The upside of which is that we FINALLY have space to work in without worrying about interruptions again. It may still be a bit before I have full on massive updates like I usually do when working though since we're going to be spending some time cleaning out the garage and moving stuff around to make it organized better. Plus I need to get some more supplies for the stuff I have, and I'm not sure when I'll feel like splurging on epoxy putty (how sad is it when that's a splurge?).

But, I have got the gears arranged and glued into place for the back of the steampunk mando helmet.

To give an idea of where it's going:


And, um. . .. I cleaned some more paint off Pere's latest clone helmet to convert. . . and. . .ok, yeah, I wasn't lying when I said it was a short list. lol Hopefully I'll have some more for you guys in the weeks to come.

Apr 19, 2011

Costume Story: Kora Solusar, V1 (purple kit)

While I have pictures up under the “Costume Archive” title and tag, I often don't feel like doing a lot of typing for those as I'm doing them more to showcase the costume. So I decided to make a separate heading for posts that will probably be TL;DR for most people but just in case . . . .


V1.0
The very first version of this kit was so painfully obviously somebody who hadn't really done this before. It was also back when the Mercs was just starting to crack down on un-modded real world stuff, otherwise I probably would have found some other solution for those parts in the first place.
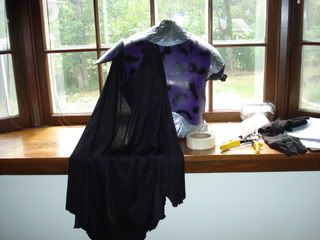
Anyway, it started out with a basic upper body kit from Cyanide on ebay, a Rubies Jango 2 piece helmet, some coveralls, and some things I already had (essentially the sports armor, boots, that sort of thing). The plates needed some serious reforming to even begin to fit me.
Yeeeaaah. So not made for a female form. lol I did things the harder way that time, forming some of the plates in the oven and tossing them in a cooler chest full of ice water to shock them into place, and I stood for at least 30 minutes or so while my dad used a heat gun to form the backplate to me better (after we trimmed it down).

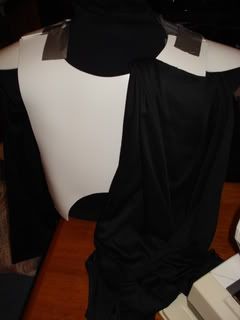
Cod plates or loin cloths weren't required then, but I wanted one, so I sliced up some scrap fabric I had. I kind of wanted a rugged/worn look to it, though I'm not sure entirely how well I really accomplished that.
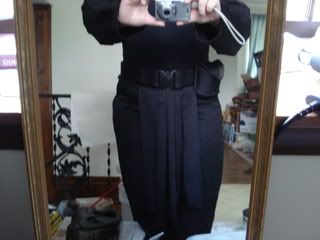
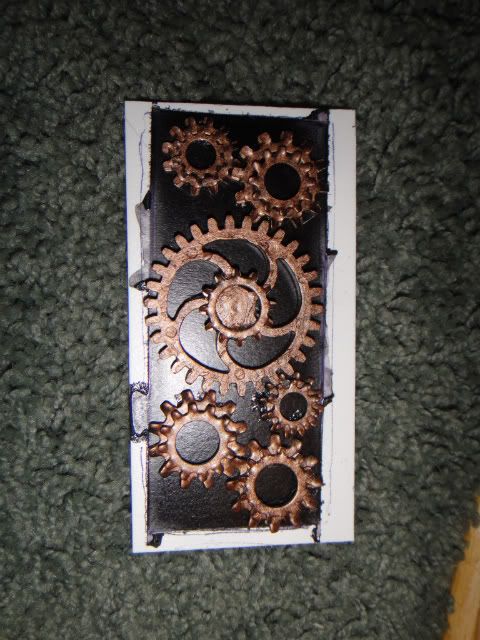
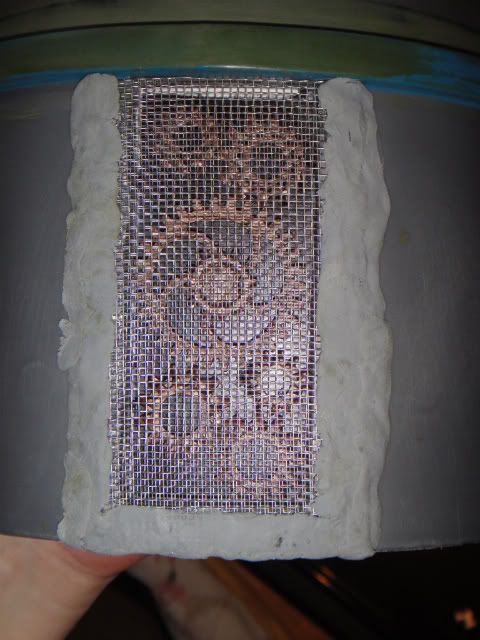
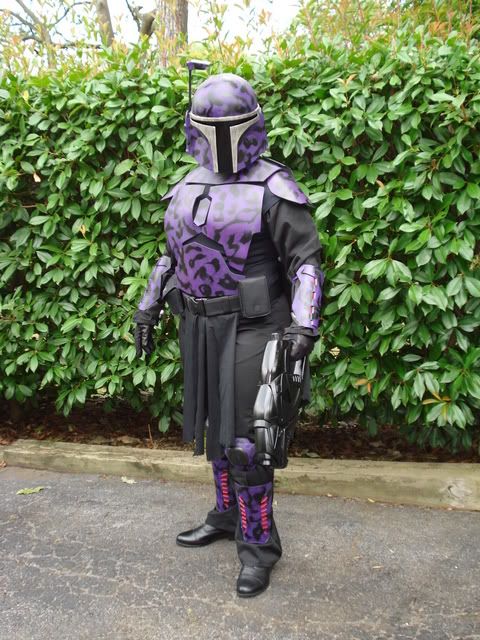
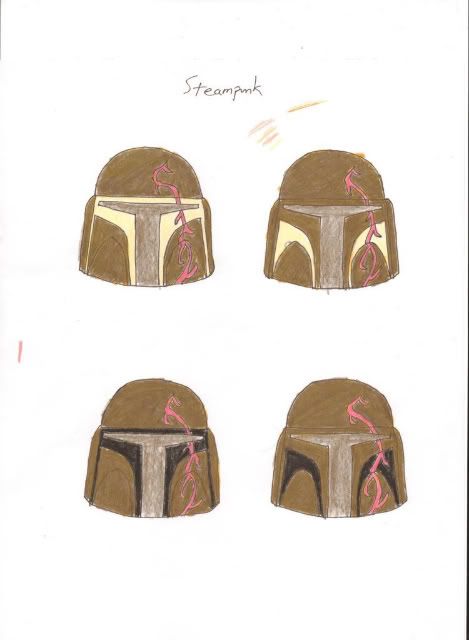
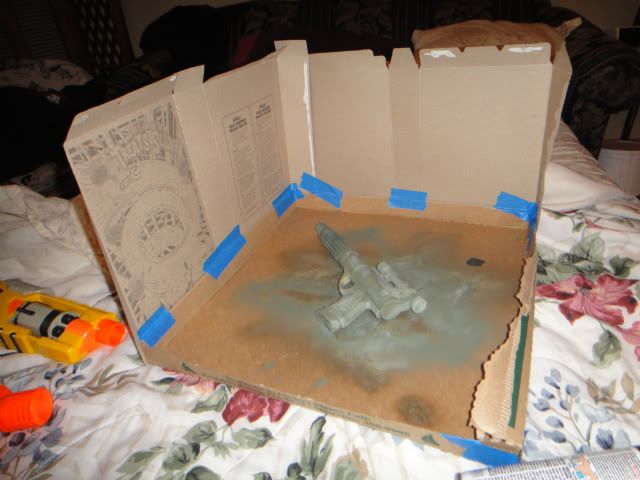
I was aiming for a sort of slicer/recon persona to begin with, so I opted for darker colors. Yes, I do realize that in a universe that has stealth field generators it probably doesn't matter, but I'd also been using black and purple with red and silver accents as my field colors at the field I sword fought at, so it was a handy “in universe” reason. My initial idea was a very, very dark purple swirled with the black. I cannot tell you why I had such a hard time finding a deep purple that was also the right shade, but oh it was pretty much impossible in TN. The darkest I found that was close was sparkly, which I didn't want. So I opted for Citadel paint's Liche Purple to airbrush on as swirls. I used cotton balls to mask off the pattern. A nice advantage of using the airbrush was that the paint layers dried fast enough that I could pluck the cotton off as I went to keep it from drying onto the armor.
And because I love capes, especially shoulder capes and capes like Boba's, I added one of those, too.

V1.1 (2009)
That first version was what I got official with, almost literally right before D*Con 2008. After D*Con, I realized just how much I still needed to work on. The chest plates still didn't fit right. I didn't like the way my legs and butt looked in the coveralls. My boots wore blisters onto my ankles (that were bad enough that I had to go change after the parade). So I got to work.

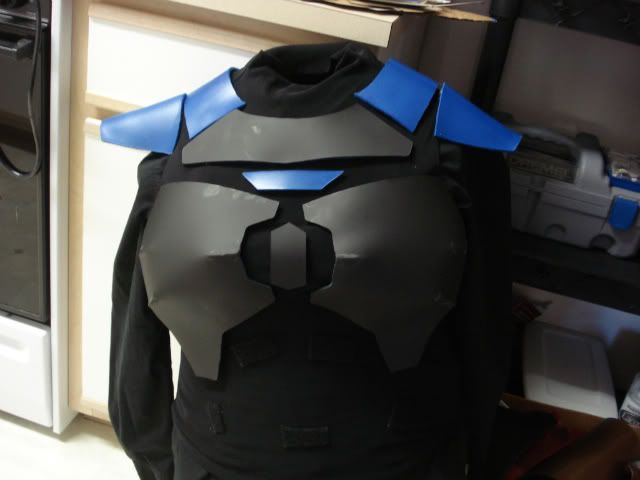
I did some serious trimming and reforming to the chest plates and trimmed the ab and shoulder plates, as well. While I had been working on my V2 kit earlier in 2009, I'd tried out a segmented collar and back plate. I hadn't finished the back plate, but I did like the look of the collar so I made a similar style collar plate for this one. I started the segmented back plate, but it was fast approaching D*Con by the time I got to it so I ended up putting it on hold and stretching out my cape to completely cover my back. New shins were made from scratch, though still had my old gauntlets and knees as the ruling about sports armor still had not been passed.

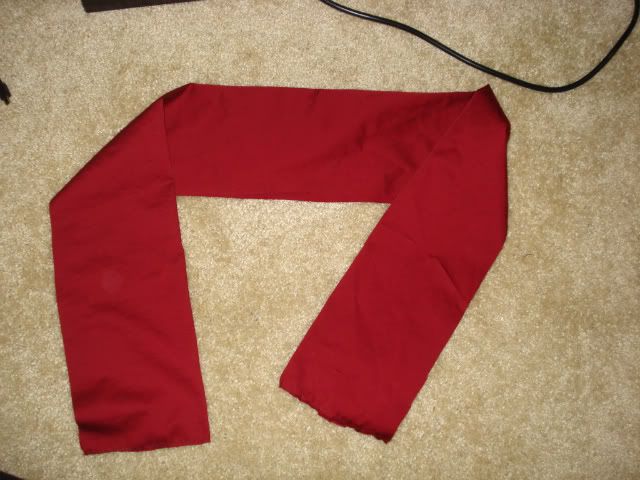
The reason for that was because, in addition to the new plates, I'd changed up my vest and didn't want to attach new velcro for a full back plate when I fully intended to make a segmented one which would most likely have different attach points. I'd also, by now, gone from coveralls to using two piece suits comprised of dress shirts and pants I found at Goodwill (I was so incredibly lucky to actually get not only matching shades of black but material that looks very similar). A kama and a new loin cloth were added to cover my thighs and butt and hopefully fill in that area some. For lols I added a scarf I got at a military store, mostly at my brother's suggestion since he wanted a scarf on his kit. Oh yeah and new boots in the hopes that I wouldn't once again be in pain after the parade.
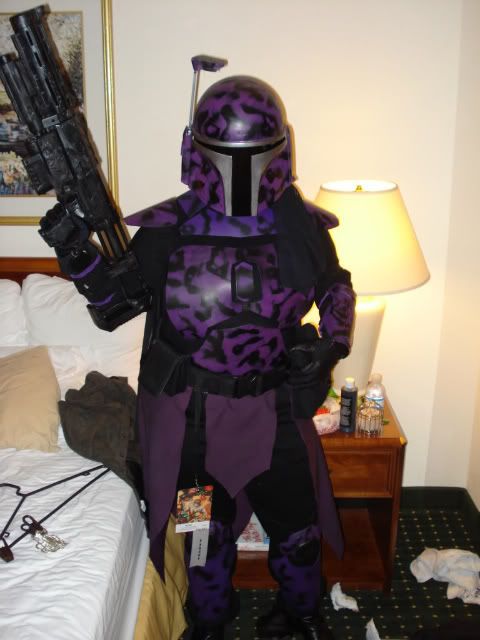
For the record, I did end up in pain once again. 0_0 I apparently have the most horrible luck picking ankle boots that don't rub some part of my ankle (of course always the part I didn't have bandages on) raw.

I was actually quite happy with most of the changes to this kit, and I fully planned on continuing with it, just working to get those chest plates shaped some more. Then. . .
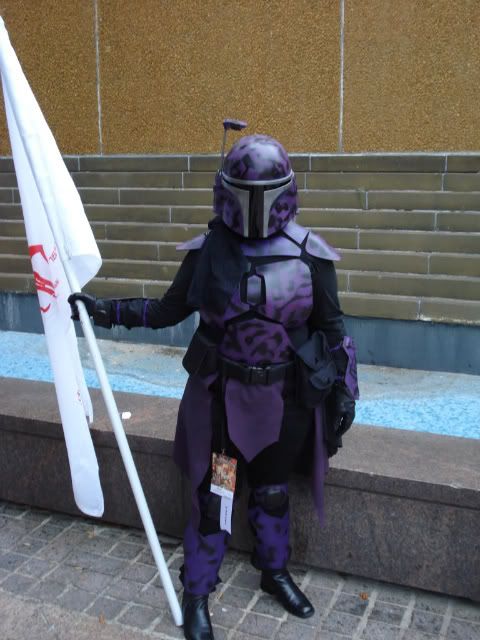
V1.2 (2010)
Most people who know me from the Mercs and followed this build know why it happened. I moved out to the west coast in early 2010, and, while my costume was being shipped out to me, one of the chest plates snapped in half. Because I didn't have an airbrush in OR, I couldn't just glue it back together and fill in the seam then repaint.

A huge thanks goes to Praetor for letting me have a sheet of 3mm sintra to scratch build my stuff all over again. I had to make new chest plate patterns (not having the ones from my V2 out there yet), and the unfortunately ended up coming up short once formed (something I am working on correcting with future patterns). Coming up short meant there was too big of a gap between them and the chest plate, so I made the piece I tend to refer to as “that damn fiddly bit.”
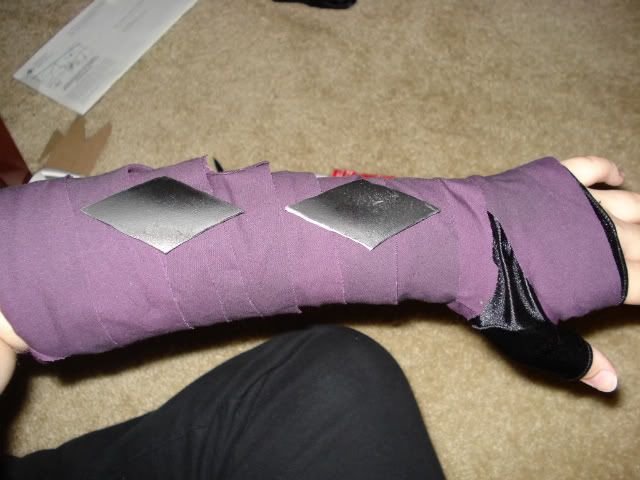
By this time the Merc's had added the “No Unmodified Sports Armor” rule, so I set about making some new gauntlets. (I'd already acquired some of Imperial Outpost Armory's Galactic Marine knees that I planned on wearing upside down because I like that look more.) I was thinking about doing armored wraps for my gauntlets and even did a fair amount of planning out for them.
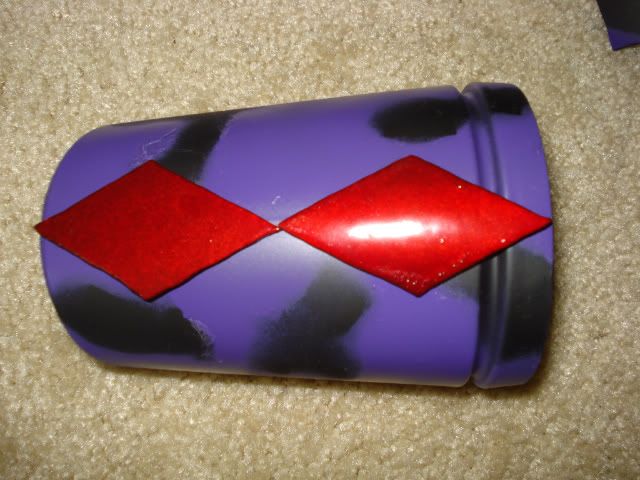
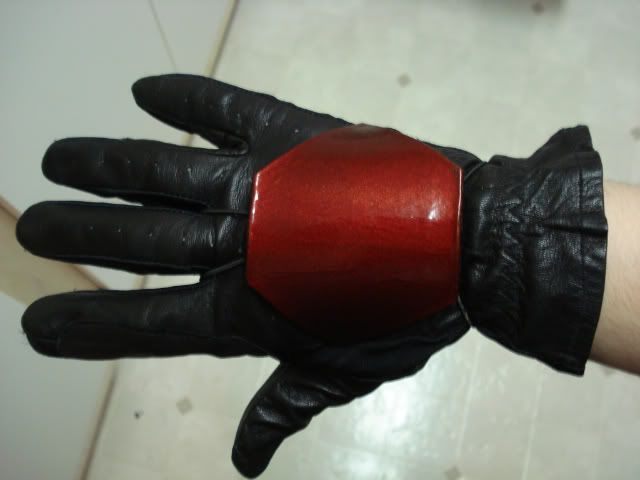
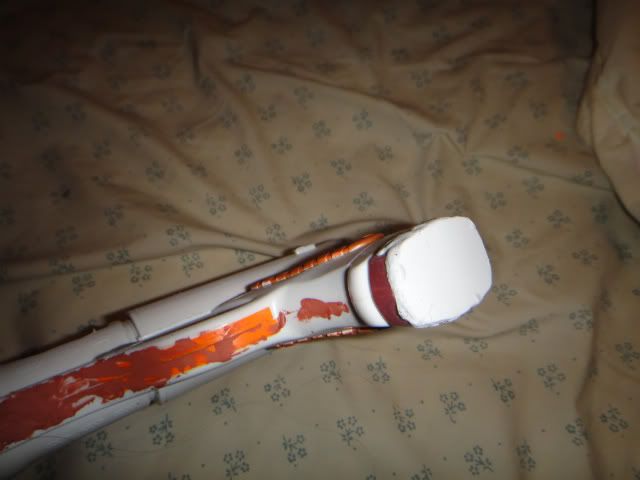
Ultimately though, they were just more hassle than it was worth to me, so I took my V2 kit's gauntlets, popped the studs off, cleaned them up and repainted. (The only picture I have to show this part was when I was debating adding some more armor to them.) I also added some armor to my gloves, which I hold on with an elastic strap with loops at both ends, one to go around my wrist the other around my middle finger.
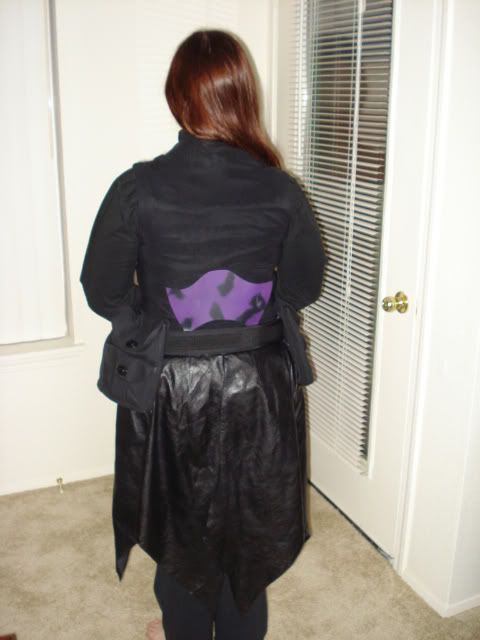
I also finally finished one of those segmented back plates; the only portion I was ever happy with happened to be the lower back (though it still needs to top curve to be evened out some).
On the soft goods front, I still had the V1.1's two piece under suit and vest. I found some new boots this time, these coming up higher on my ankle so I could tuck my pants in, and they thankfully don't rub anything raw (though I do have to wear certain socks and stuff the toe a bit but it was a fair exchange for no more blisters). I attempted to add a girth belt, which required getting creative as I didn't have a sewing machine at this time, either. Lots of fabric glue and bias tape. XD I also upgraded the kama and loin cloth to the leather ones from my V2 kit and decided I had to give them some trim after I found some perfect trim at Joann's.
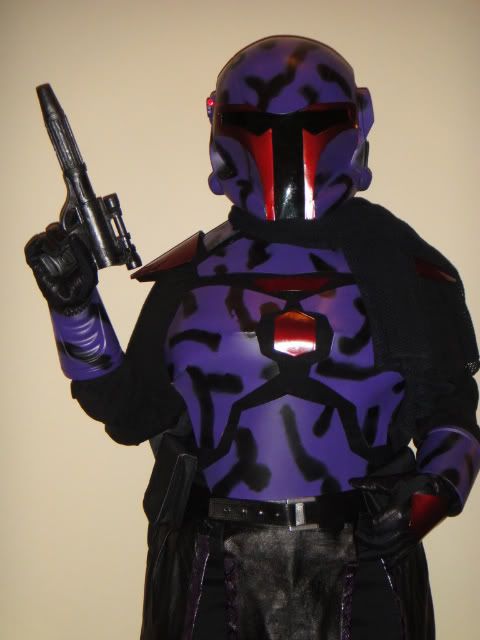
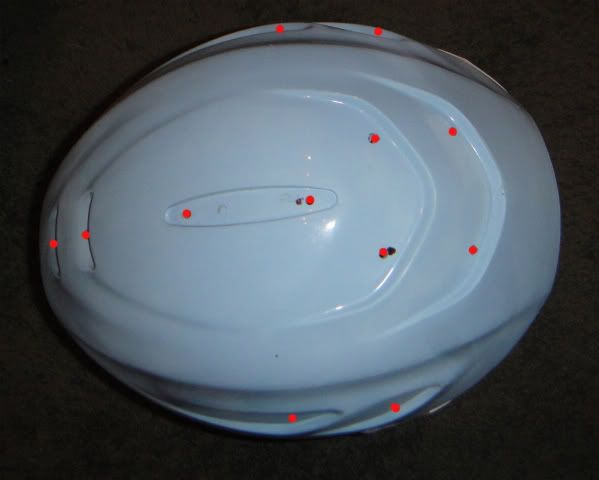
I had also by now finally gotten my new helmet that I wanted to try out for the kit (and had actually wanted for the V1.1). This one is one of, well, not many, Commando helmets made by Ick'tan. There aren't anymore being made to the best of anybody's knowledge (as of this post). They're a hybrid between the Republic Commando helmets and Mando helmets and came out about roughly similar to a 2 piece in size. Unfortunately, there were flaws in the casting. Pere put in a lot of time filling in small holes plus sanding down a good blob of epoxy putty to fill in a dent that left the top of the helmet looking lopsided. I also reinforced a couple spots with fiberglass where the resin was thin. Because I like to be different, I also added the funky visor cut out, similar to what I did with my Beast Master helmet.
This version was debuted at the NWC clan picnic in August. I had somehow forgotten one of my over the shoulder collar plates, so my scarf had to be kept arranged to hide it but otherwise it wasn't half bad. (By this time I also trimmed off those bottom mandibles on the helmet as I thought that made it too long on my head.)
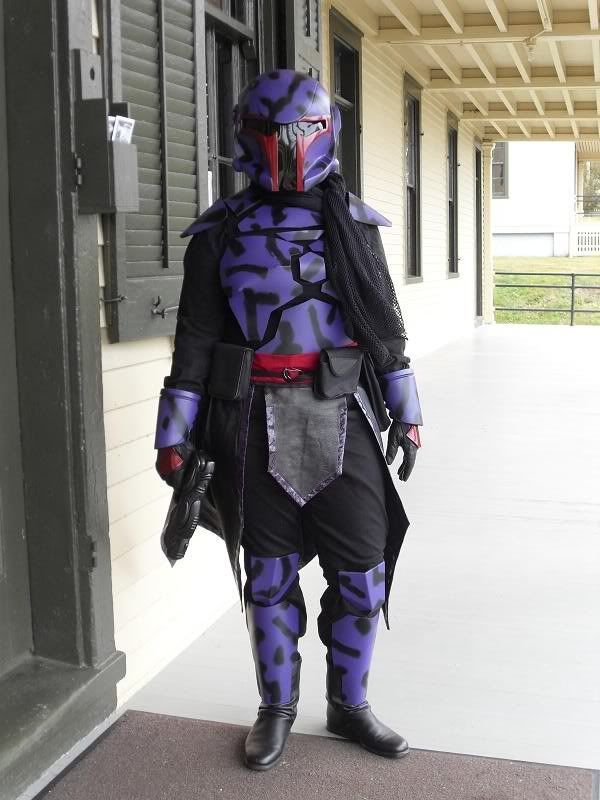
V1.2 repaint (2011)

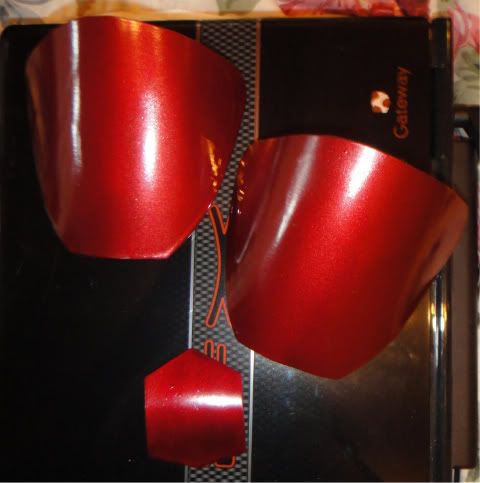
Since virtually nothing has changed from the 2010 version to this one, I'm just calling it a repaint. Those who have been following my blog know that not only did the shoulder bells get their paint messed up by the cape fabric resting on them, but I also thought I lost “that damn fiddly bit” so I remade it. Because I didn't have my spray paints up here and didn't want to hassle with getting the purple and the black and doing all that masking and repainting with bad weather, I just found some more of the red paint I used to redo those plates. I also got rid of the girth belt and got a new leather belt (while the 2010 version is pictured with that weak little fabric one, I had had a leather belt but the buckle broke several weeks before the picnic and I couldn't find a replacement in time). Due to more changes in the Merc's rules (and my refusal to cut slits in pants I wear around as normal clothes sometimes), I made some “scrunchies” out of left over cape fabric to cover the elastic bands on my shin armor. (The scrunchy pics can be found in one of the blog posts detailing that work.)

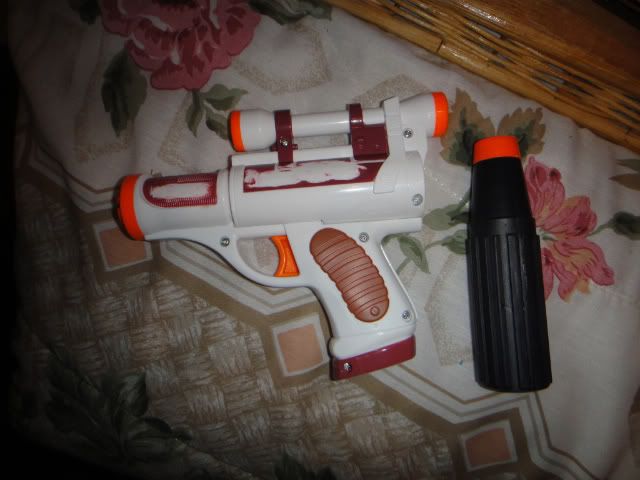
A new pistol was also whipped together using one of those Cade Bane Hasbro blasters and attaching a barrel extension from some cheapo dart gun.

V1.3 (the future)
Obviously there aren't any images of this kit in this post because it hasn't even been started yet. Because my V1.2 uses the vest of V1.1 the plates don't really sit as well on it as they should. As such I'm constructing a new vest, as well as just going ahead and trying to make some chest plates out of a mannequin form. I'm switching back to a Jango style helmet (the Commando will become a display piece) and trying out a new purple paint for the airbrush that I found at HobbyTown USA. Look for that kit. . .In the Future! *insert dramatic 50s sci-fi music here*


Apr 17, 2011

New Facebook fan page

Because I honestly got bored and figured "why not?" So, here it is. I assume this particular link won't work once I set an actual page address, but I need 75 likes to do that (I think). But the link on the side bar under "Around the Web" will be updated and current whenever that changes.


And link: Kora's Facebook Page

Apr 10, 2011

Lots of little things done (including new color concepts)

Nothing huge has been done this week, well, nothing I consider huge anyway. I did finally manage to get suited up and take some basic pictures to show the emergency changes to Kora's purple outfit. Not going to post those mostly because they're just rather blah "look everything is in place" kind of pictures, not the dynamic outdoor stuff I wanted to do. (Also, guess what I found just the other night cleaning out my laptop bag. . .yeah, that stupid fiddly plate I had to remake. *sigh* How it got into my computer bag I will never know.)

Haven't started on the new vest for Kora yet. Fingers crossed we get around to it tonight. Pere's got to draft the pattern for me as that's one area I'm rather very bad at. Once I get the pattern though he's donating his Arc trooper kama fabric to the cause so we can make it out of that since it's going to be so long until that costume of his is done anyway. Another hopeful side effect of drafting up a new vest for me is that I can use the top portion of it for my corset vest stuff I'm trying to figure out (it is, for the record, nowhere near fun trying to figure out how I can have a vest wherein the below bust portion fastens in the front and the bust and up portion fastens in the back 0_o ).

The steampunk mando has also been put on hold indefinitely. I'm using Chesty (the mannequin chest) to make Kora some new chest plates, rather than us keep waiting until we can get around to fiberglassing a body cast. So that means I have nothing for the steampunk outfits armor beyond the cod plate and helmet anymore. The helmet, however, I am going to fix up, so even if the rest of the costume never gets done I'll have a nice display piece. *chuckle* Debated the color arrangement for some time, but I think I'll be going with this top right version:

A little bit more fiddly work has been done on the new helmet for Tiika, the early crusader beast master kit. Trimmed down the sintra, drilled the pilot holes for the small horns, and started adding the epoxy putty to it. Need more epoxy putty to finish smoothing out stuff and building the horns, plus need glassing stuff to fiberglass the sintra and reinforce it. I'm thinking I'm going to attempt doing something similar to how people do the body forms then glass them for the big horns. Pictures following, though nothing really astounding yet (the red dots sort of show the small horn arrangement):

And in the "because I was bored" category, made a color concept for my eventual femprotector kit. Looking forward to making that one whenever I have the money. (Feel free to laugh at the helmet/neck area. . .I had to downsize the helmet image then splice the two images together so it looks a bit silly.) The cheeks won't be so minty green, and the shoulders/knees are supposed to be a goldenrod yellow not that almost orange shade. Silly scanner changing the colors on me.

Got the two buttons fixed into one of my brother's gauntlets. Maybe I've said that in a previous post? I can't remember. I was going to get the blaster barrel fixed onto the other gauntlet, but it appears to have gone missing for the moment. >_< Still debating other greeblies to add to his gauntlets, plus I need to figure out what size hose I'll have to get to attach to the back of the barrel.


That's about it for this week, I suppose. Hopefully next weekend I'll have some more progress worth showing. 

Apr 1, 2011

Minor tweeking and mostly finished prop pistol

Giving the new name for the blog a try. Came about while Pere and I were driving back from Walmart reeaally early this morning, and I, commenting on my lack of costume stuff to work on at night, pointed out that I couldn't really do anything other than spraypaint in the mist which wouldn't really work. And I just sort of thought that was at least a slightly more amusing name than the old one. May change it again, I'm not completely sold on this one, but there you have it.

Since Joann's has their Simplicity patterns on sale for 99 cents from Thurs. - Sun. I used up the last of my gift card to snag some. Sadly, they did not have the one I really want (2172, I'd love to mod that over coat), but I hope to find uses for the ones I did get. Two were really more for everyday clothes for me, though I can use them for costume stuff, too. The other two are just ones I've been looking at for a while.


I've also spent this week sort of frantically putting together a new pistol for Kora to use. I say sort of frantically because I didn't want to take my CK clan pictures without it, and I've had to work around lack of ability to use the garage and rain. Originally this started as one of those dinky little Hasbro Cad Bane blasters. The night before, while rearranging my hard greebly box looking for stuff for my brother's gauntlets, I realized I had the barrel from some cheapo blaster I got at Goodwill ages ago. This equaled much excitement because I'd been putting off getting the Cad Bane blaster only because I thought it was too short for an adult to use. 
 All it took was: sanding off the labels, gluing the slide in place, sanding off the back part of the barrel and gluing it to the body of the gun, sanding off the dart holders on the grip then covering that with plastic, then epoxying the screw holes and around the rim of plastic cover on the grip bottom.
Then came the "fun" part. Painting. This would normally not be an issue except I couldn't exactly paint in the rain, and I can't use the garage at the moment. I happened to notice that there's a spot on Pere's porch which doesn't get hit by rain though. So I whipped together a box to prevent over spray and got the spray painting done.
Used up the last of my self etching primer, but it was for a good cause. Got the Krylon Satin Black on and dry brushed on the Tamiya gun metal. This is where it stands now:
It's good enough for pictures, but Pere is still going to put styrene strips down on the "ribbed" part just behind the barrel that I'll need to paint once he's done. Then a clear coat, and it's 100% good to go.