While I have pictures up under the “Costume Archive” title and tag, I often don't feel like doing a lot of typing for those as I'm doing them more to showcase the costume. So I decided to make a separate heading for posts that will probably be TL;DR for most people but just in case . . . .
V1.0
The very first version of this kit was so painfully obviously somebody who hadn't really done this before. It was also back when the Mercs was just starting to crack down on un-modded real world stuff, otherwise I probably would have found some other solution for those parts in the first place.
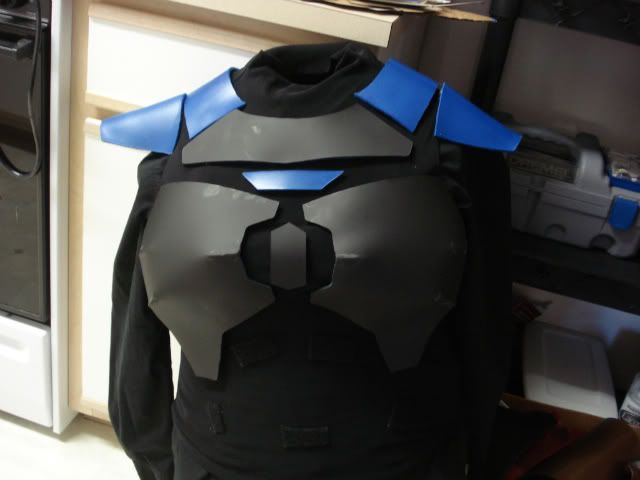
Anyway, it started out with a basic upper body kit from Cyanide on ebay, a Rubies Jango 2 piece helmet, some coveralls, and some things I already had (essentially the sports armor, boots, that sort of thing). The plates needed some serious reforming to even begin to fit me.
Yeeeaaah. So not made for a female form. lol I did things the harder way that time, forming some of the plates in the oven and tossing them in a cooler chest full of ice water to shock them into place, and I stood for at least 30 minutes or so while my dad used a heat gun to form the backplate to me better (after we trimmed it down).
Cod plates or loin cloths weren't required then, but I wanted one, so I sliced up some scrap fabric I had. I kind of wanted a rugged/worn look to it, though I'm not sure entirely how well I really accomplished that.
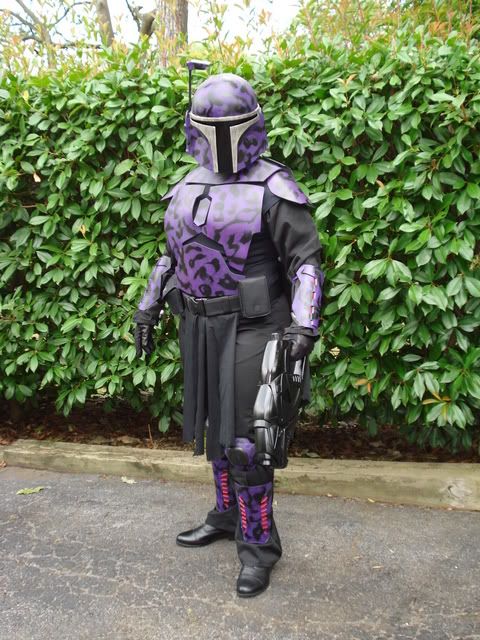
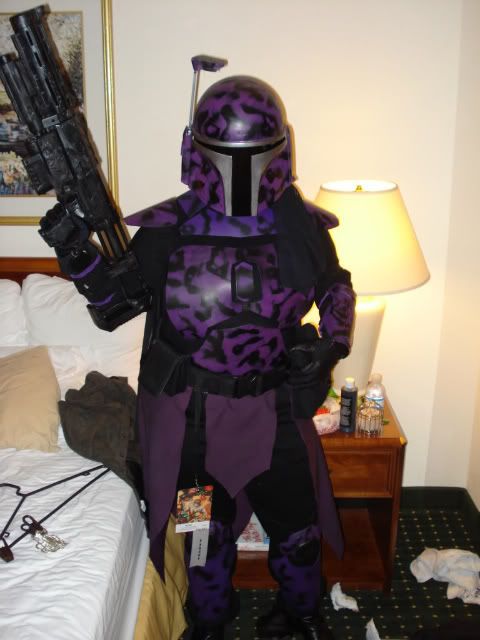
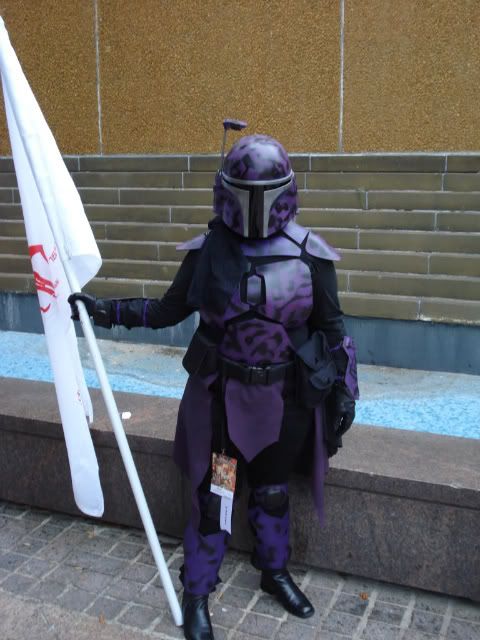
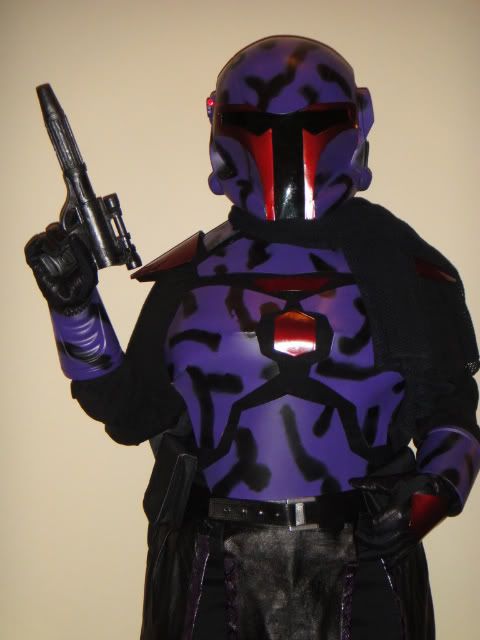
I was aiming for a sort of slicer/recon persona to begin with, so I opted for darker colors. Yes, I do realize that in a universe that has stealth field generators it probably doesn't matter, but I'd also been using black and purple with red and silver accents as my field colors at the field I sword fought at, so it was a handy “in universe” reason. My initial idea was a very, very dark purple swirled with the black. I cannot tell you why I had such a hard time finding a deep purple that was also the right shade, but oh it was pretty much impossible in TN. The darkest I found that was close was sparkly, which I didn't want. So I opted for Citadel paint's Liche Purple to airbrush on as swirls. I used cotton balls to mask off the pattern. A nice advantage of using the airbrush was that the paint layers dried fast enough that I could pluck the cotton off as I went to keep it from drying onto the armor.
And because I love capes, especially shoulder capes and capes like Boba's, I added one of those, too.
V1.1 (2009)
That first version was what I got official with, almost literally right before D*Con 2008. After D*Con, I realized just how much I still needed to work on. The chest plates still didn't fit right. I didn't like the way my legs and butt looked in the coveralls. My boots wore blisters onto my ankles (that were bad enough that I had to go change after the parade). So I got to work.
I did some serious trimming and reforming to the chest plates and trimmed the ab and shoulder plates, as well. While I had been working on my V2 kit earlier in 2009, I'd tried out a segmented collar and back plate. I hadn't finished the back plate, but I did like the look of the collar so I made a similar style collar plate for this one. I started the segmented back plate, but it was fast approaching D*Con by the time I got to it so I ended up putting it on hold and stretching out my cape to completely cover my back. New shins were made from scratch, though still had my old gauntlets and knees as the ruling about sports armor still had not been passed.
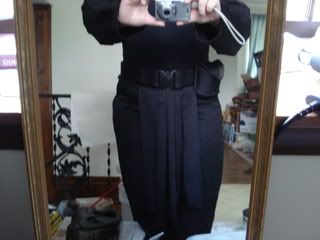
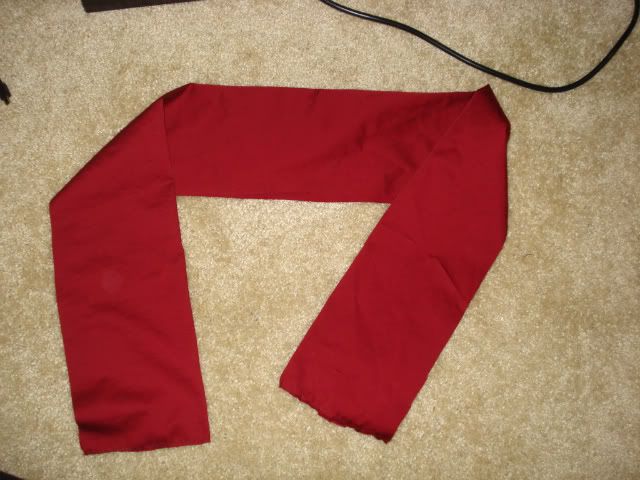
The reason for that was because, in addition to the new plates, I'd changed up my vest and didn't want to attach new velcro for a full back plate when I fully intended to make a segmented one which would most likely have different attach points. I'd also, by now, gone from coveralls to using two piece suits comprised of dress shirts and pants I found at Goodwill (I was so incredibly lucky to actually get not only matching shades of black but material that looks very similar). A kama and a new loin cloth were added to cover my thighs and butt and hopefully fill in that area some. For lols I added a scarf I got at a military store, mostly at my brother's suggestion since he wanted a scarf on his kit. Oh yeah and new boots in the hopes that I wouldn't once again be in pain after the parade.
For the record, I did end up in pain once again. 0_0 I apparently have the most horrible luck picking ankle boots that don't rub some part of my ankle (of course always the part I didn't have bandages on) raw.
I was actually quite happy with most of the changes to this kit, and I fully planned on continuing with it, just working to get those chest plates shaped some more. Then. . .
V1.2 (2010)
Most people who know me from the Mercs and followed this build know why it happened. I moved out to the west coast in early 2010, and, while my costume was being shipped out to me, one of the chest plates snapped in half. Because I didn't have an airbrush in OR, I couldn't just glue it back together and fill in the seam then repaint.
A huge thanks goes to Praetor for letting me have a sheet of 3mm sintra to scratch build my stuff all over again. I had to make new chest plate patterns (not having the ones from my V2 out there yet), and the unfortunately ended up coming up short once formed (something I am working on correcting with future patterns). Coming up short meant there was too big of a gap between them and the chest plate, so I made the piece I tend to refer to as “that damn fiddly bit.”
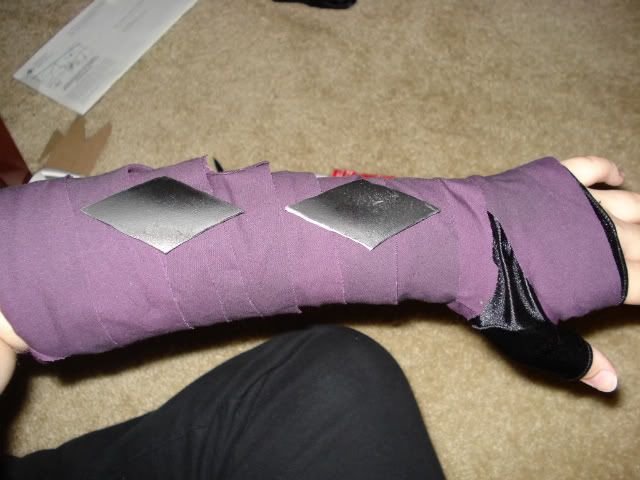
By this time the Merc's had added the “No Unmodified Sports Armor” rule, so I set about making some new gauntlets. (I'd already acquired some of Imperial Outpost Armory's Galactic Marine knees that I planned on wearing upside down because I like that look more.) I was thinking about doing armored wraps for my gauntlets and even did a fair amount of planning out for them.
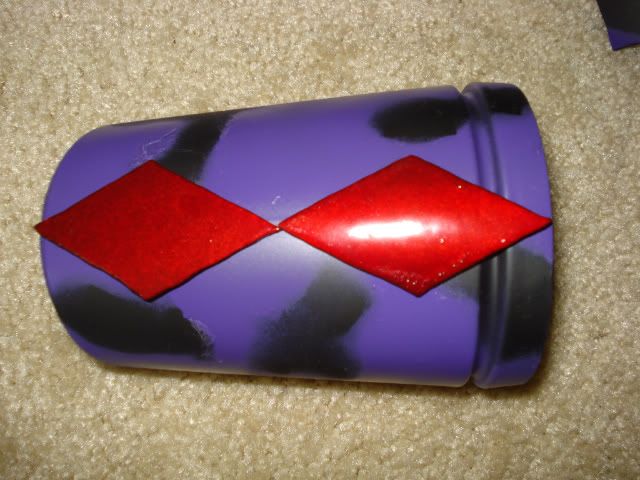
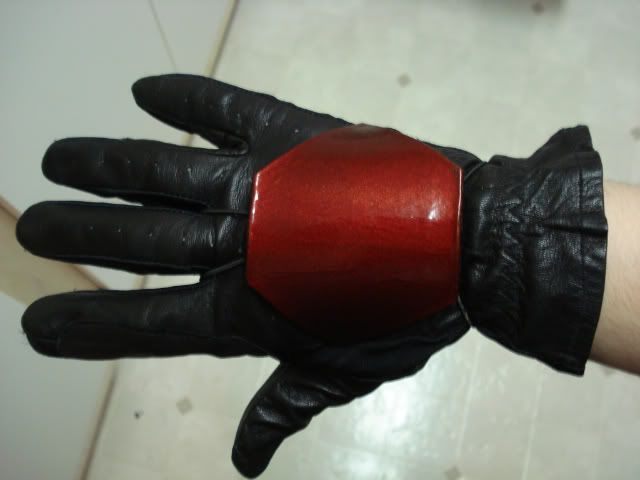
Ultimately though, they were just more hassle than it was worth to me, so I took my V2 kit's gauntlets, popped the studs off, cleaned them up and repainted. (The only picture I have to show this part was when I was debating adding some more armor to them.) I also added some armor to my gloves, which I hold on with an elastic strap with loops at both ends, one to go around my wrist the other around my middle finger.
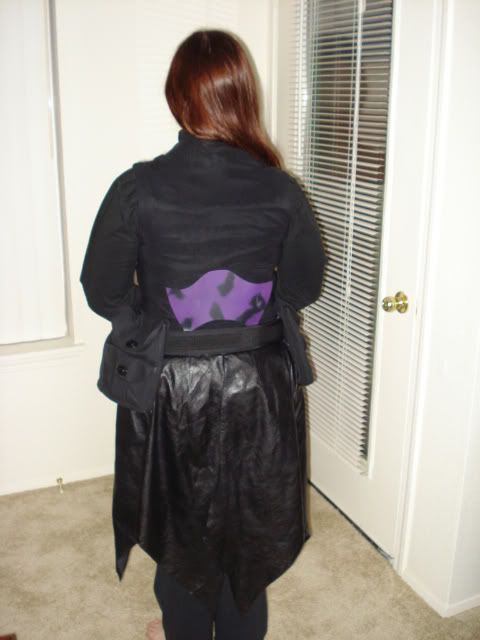
I also finally finished one of those segmented back plates; the only portion I was ever happy with happened to be the lower back (though it still needs to top curve to be evened out some).
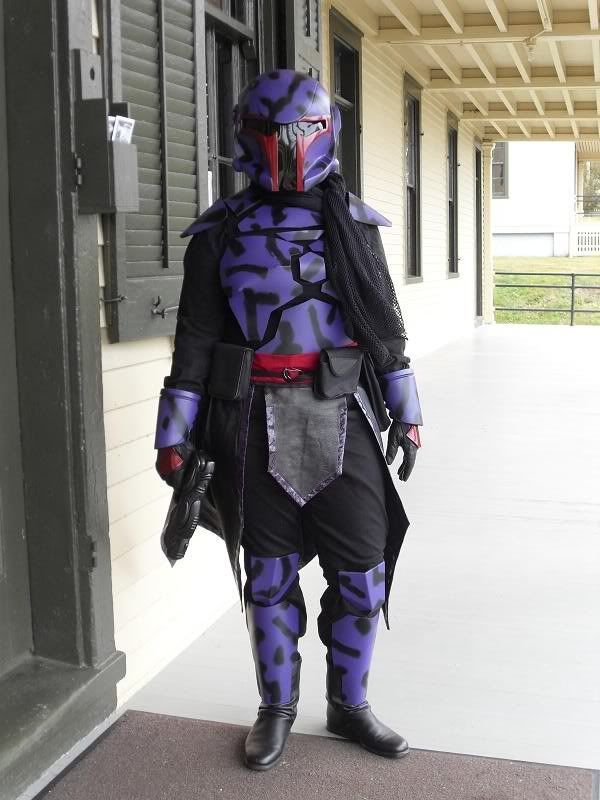
On the soft goods front, I still had the V1.1's two piece under suit and vest. I found some new boots this time, these coming up higher on my ankle so I could tuck my pants in, and they thankfully don't rub anything raw (though I do have to wear certain socks and stuff the toe a bit but it was a fair exchange for no more blisters). I attempted to add a girth belt, which required getting creative as I didn't have a sewing machine at this time, either. Lots of fabric glue and bias tape. XD I also upgraded the kama and loin cloth to the leather ones from my V2 kit and decided I had to give them some trim after I found some perfect trim at Joann's.I had also by now finally gotten my new helmet that I wanted to try out for the kit (and had actually wanted for the V1.1). This one is one of, well, not many, Commando helmets made by Ick'tan. There aren't anymore being made to the best of anybody's knowledge (as of this post). They're a hybrid between the Republic Commando helmets and Mando helmets and came out about roughly similar to a 2 piece in size. Unfortunately, there were flaws in the casting. Pere put in a lot of time filling in small holes plus sanding down a good blob of epoxy putty to fill in a dent that left the top of the helmet looking lopsided. I also reinforced a couple spots with fiberglass where the resin was thin. Because I like to be different, I also added the funky visor cut out, similar to what I did with my Beast Master helmet.
This version was debuted at the NWC clan picnic in August. I had somehow forgotten one of my over the shoulder collar plates, so my scarf had to be kept arranged to hide it but otherwise it wasn't half bad. (By this time I also trimmed off those bottom mandibles on the helmet as I thought that made it too long on my head.)
V1.2 repaint (2011)
Since virtually nothing has changed from the 2010 version to this one, I'm just calling it a repaint. Those who have been following my blog know that not only did the shoulder bells get their paint messed up by the cape fabric resting on them, but I also thought I lost “that damn fiddly bit” so I remade it. Because I didn't have my spray paints up here and didn't want to hassle with getting the purple and the black and doing all that masking and repainting with bad weather, I just found some more of the red paint I used to redo those plates. I also got rid of the girth belt and got a new leather belt (while the 2010 version is pictured with that weak little fabric one, I had had a leather belt but the buckle broke several weeks before the picnic and I couldn't find a replacement in time). Due to more changes in the Merc's rules (and my refusal to cut slits in pants I wear around as normal clothes sometimes), I made some “scrunchies” out of left over cape fabric to cover the elastic bands on my shin armor. (The scrunchy pics can be found in one of the blog posts detailing that work.)
A new pistol was also whipped together using one of those Cade Bane Hasbro blasters and attaching a barrel extension from some cheapo dart gun.
V1.3 (the future)
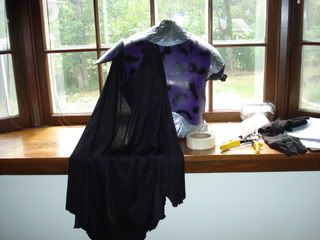
Obviously there aren't any images of this kit in this post because it hasn't even been started yet. Because my V1.2 uses the vest of V1.1 the plates don't really sit as well on it as they should. As such I'm constructing a new vest, as well as just going ahead and trying to make some chest plates out of a mannequin form. I'm switching back to a Jango style helmet (the Commando will become a display piece) and trying out a new purple paint for the airbrush that I found at HobbyTown USA. Look for that kit. . .In the Future! *insert dramatic 50s sci-fi music here*






No comments:
Post a Comment